The Tiny House, Part 2…Living Room & Kitchen
I hope you caught my first post about my Tiny House in the woods, but if not – here it is. Go catch up!

This little gem (truly, a gem to me) has gotten better each and every week. It was just about this time last year that the support flooring was done…I remember quite distinctly laying in the hammock watching Jon as he worked on it. (I know, I am so awful.)
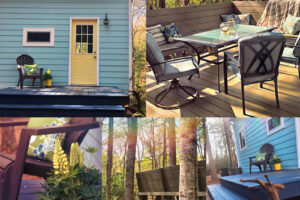
But here we are now, and all that is lacking is the final bit of electrical wiring and the walls of the bathroom. Some plumbing has been done, but not completed (still need those bathroom walls, you know) but it’s not far off. Last weekend, Jon and his brother-in-law built an amazing deck on the back, which completely transforms the house, and this weekend I hope we get to tackle more of the inside.
The inside.
I can’t tell you how in love with it I am.
Let’s start with the living room/kitchen area.
This room is small, of course, at 12 by 16 feet. We practically live in here, when we aren’t sleeping, of course, and I am a freak about keeping it tidy. We have nothing superfluous out there, and it makes life SO much easier.

The floors are the same throughout the entire main level of the house…a floating laminate we picked up on a huge sale at Lowes. Neither of us had installed flooring before, but late one evening, we brought it in, used our common sense, and by the next day, the entire house was done. It’s quick and easy, and very durable, and the color is just perfect for us. It looks like an old barn wood, and I couldn’t be happier with it. At under $400 for the underlayment, flooring, and couple of needed tools for the WHOLE HOUSE, you’d be hard pressed to find anything better.

To dress out the living room, we bought a leather sofa at Big Lots for a little bit of nothing, a few throw pillows from TJ Maxx, and some storage boxes from Michaels to keep things like candles and such in. The walls are decorated with a map of the US to commemorate our cross country trip, a cool EAT sign, and a few masks from our international travels. To tie in with the rest of the barn board in the house, we found a long and wide piece to attach the masks to – it looks perfect there above the sliding door.

In the kitchen section, we bought new cabinets from Lowes and I painted and stained them to make them look like flea market finds. Very durable, and yet rustic…they match so well. Jon built the open cabinet that houses the mini-fridge, and I also painted it to tie in with the others. Seven and I beat those cabinets with hammers and chains and nails like you can’t imagine. The whole family got involved! I bought some brushed nickel hardware to make all of the cabinets look similar, despite the different colors, and even used some scrapbooking keyholes on a couple to make them look old and collected. I love the results.

Because the sides of stock cabinets are unfinished, we needed to do something. So, throughout the house we had been using old barn board. On the property is an old “moonshining house” that had fallen in for the most part. Jon and Seven salvaged a good amount of good looking lumber from there – it’s old and worn, gorgeous colors – even greenish – so we used that as some of our window trim. For the cabinets, we used it as the kick plates, and on the exposed sides of the cabinets as well. My friend Nicole bought me a set of cast iron horns for my birthday, so on the tall pantry cabinet, we attached those horns to use as coat hangers. It’s fantastic!


For the countertop, we really struggled with that. For the longest time, we kept a scrap piece of plywood there, just to have a surface, but finally, we went with an actual timber counter. A few pieces of treated lumber (so thick!), that Jon and BranAppetit’s husband sandwiched together got stained a very dark color, almost black, then glazed about a million times. It’s stunning, especially where you can see the grain of the wood still coming through, and it looks great on the lighter cabinets. A round sink from IKEA is what we went with in the center, and soon we will have a blackish metal faucet installed as well.
Above that, we hung an ollllddddd sled from the ceiling. Yes, a sled. We have a few cast iron pots sitting on top of it, and all of our other pots and pans and utensils hanging off of it. It’s so whimsical and perfectly functional…it’s one of my favorite things in the house!

For more storage and for eating, we bought a rolling island with a fold up top. For the most part, we keep it against the wall, just as cabinetry, but if we want to eat at it, we roll it into “island formation”, fold out the table top, and can eat there. We keep all of our food stuffs inside the cabinet, along with utensils and such, as well as a huge collection of DVDs.

Ahh, DVDs. Yep, we installed a TV in that room. Sadly, because we are so far removed, we couldn’t get an antenna to pick up TV stations. But, we bought a DVD player and plenty of DVDs. Jon rigged up a big battery so that we can watch the TV without using the generator, so most nights you will find us out there, curled up watching Indiana Jones or The Hustler. We were able to run all of the cords and wiring inside the walls, so, it looks great hanging there, almost like we planned it that way! (I totally did. Lol)
The lights in the room are minimal. I bought a “paper” lantern (huge) from Lowes, and that is hanging from the ceiling…15 or so feet up. Let’s just say that was a challenge. And there is also a wall mounted light that came from IKEA, which we modified using more barn board. It looks really nice, and I am pretty excited to get the wiring finished so that I can see everything lit up!

Finally – and very importantly – the fireplace. We went back and forth so many times on what to do for heating, but finally, we ended up with this propane fireplace. We made it the entire (frigid) winter on one 100 pound tank, so – great! It’s nice to look at, and does a great job of heating the place up. I’m happy we went that route versus the potbelly stove we originally planned on. it would have taken up entirely too much space, been smoky, and dirty. This is clean and nice…and just what I wanted.
I’ll cover the ladder (Jon built it, of course) and the bedrooms in a separate post. This one has gotten long on me! Hopefully you like nosing around at what we’ve been doing…I know I have enjoyed sharing it with you!


June 8, 2015 @ 4:52 pm
I LOVE this – a dream of mine, too!
June 8, 2015 @ 5:46 pm
I love it! I especially love the sled idea as a pot rack. Can’t wait to see the rest of it!
June 9, 2015 @ 4:12 am
Very cool, nice job. One of our Tater Team has built two tiny houses, the second in Hawaii that she rents out on air B&B. Do a search for Tiny House on the Prairie, Kristy Wolfe. She even did a video, something to think about as your family progresses on this. Loved the treatment of the kitchen cabinents and so smart to start with new for the fit and slides.