
S’mores Cake Pops…from Pint Sized Baker
Happy Friday!
I’m all packed and ready for Boston…I leave in oh, an hour! But, before I go, I have an amazing guest poster here today. It’s Karyn, from Pint Sized Baker…and let me tell you, she certainly fits her name! I met Karyn at Mixed last year, and of course, since she’s a West Virginia girl, I had to take a liking to her.
I think you will, too!
(I mean, come on now…tell me you don’t want one of those gooey, marshmallow topped pops??)
Thanks, Karyn!!
 Hi everyone! I’m Karyn from Pint Sized Baker. I’m a wife to Mr. Quart and a mom to my Little Cup. The best part of writing a blog about baking treats, is that they enjoy eating them!
I am a Cake Popping Crazy Lady! If you are looking for the tutorials on making cake pops, head on over and check out my collection!
I’ve also got some videos on how I make Cake Pops. Check them out if you have problems making cake pops.
Susan asked if I could share a S’mores treat with you while she’s out promoting her NEW S’mores Book!!! As I looked over her amazing new book, I quickly saw that she was missing CAKE POPS!! Oh, the horror! Lol!
I love making cake pops and try to have a new cake pop tutorial every Thursday evening. I hadn’t made S’mores pops for Pint Sized Baker yet, so I figured this was perfect timing!
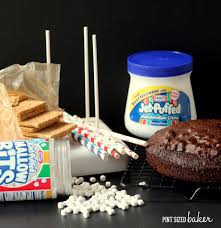
If you have tried cake pops, and had less than stellar results, you’re not alone. It does take time to learn how to make them. I have a few YouTube videos on Making Cake Pop Batter and Dipping Cake Pops if you need some help with them. Here are a few things that you’ll need to make S’mores Cake Pops:
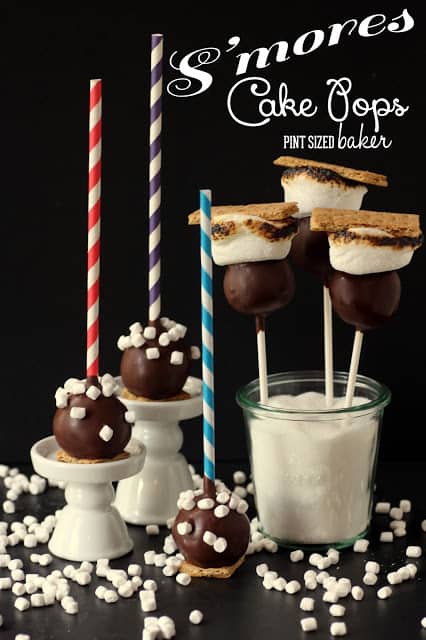
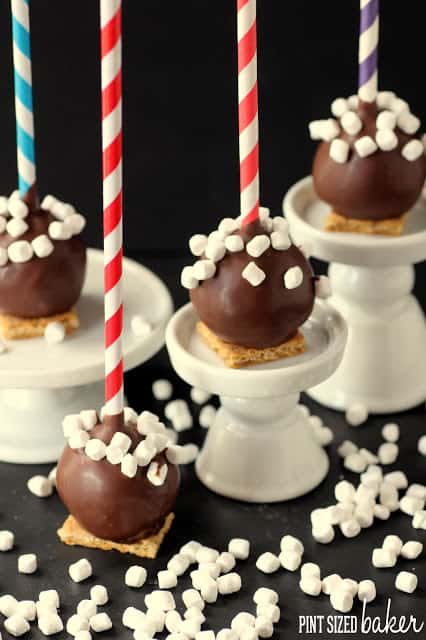
 Just your basic stuff of cake, marshmallows, graham crackers, sticks and a stand, candy coating and your imagination. Once that’s ready, it’s completely up to you as how you want your s’mores cake pops to be. I made these easier ones by using some fun paper straws in place of sticks and placed them down on a graham cracker square so they would stand up on their own. This is generally the preferred orientation of cake pops if you’re displaying them at a party.
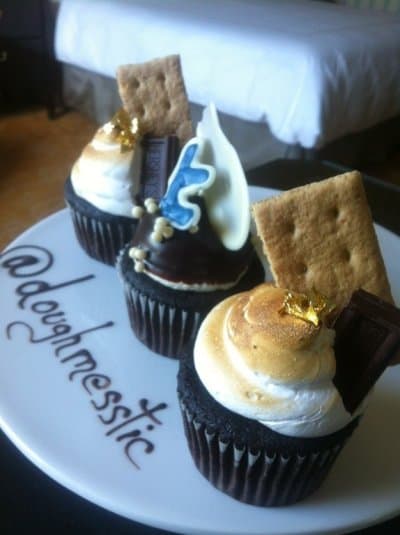
 These were fun and all, but I really liked the melted marshmallow on top of the cake pop the best!
While all the required elements are present in the basic cake pops, the ooey gooey melted marshmallow is needed for a truly authentic s’mores experience.
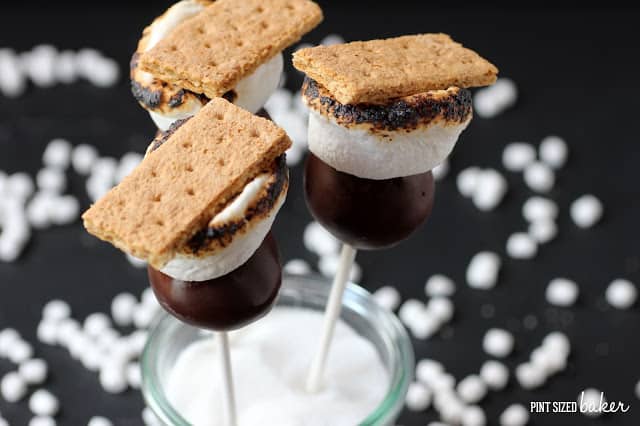
This time around I dipped my cake pop and then topped with with half of a jumbo marshmallow. Then I placed them into the freezer for 10 minutes to make sure that the candy shell was really cold! Once they were cold, I was able to toast the marshmallow with minimal chocolate melting. It did get soft and threaten to melt, but I just kept that flame moving to soften and brown the marshmallow then I topped it with a graham cracker!
I hope that you give these s’mores cake pops a try! If you do, I’d love for you to share them with with me either Facebook, Twitter, or Instagram! Thanks so much for having me over today, Susan! Best of Luck with the Book!
S’mores Cake Pops
Ingredients
- 1 9″ round chocolate cake or 1/2 a 13×9 cake, baked
- 1/4 cup marshmallow fluff or cream
- 15- 20 lollipop sticks or paper straws
- Chocolate Candy Coating (I like to use the fondue fountain chocolate)
- Mini Dehydrated Marshmallows
- Graham Crackers
- Jumbo or standard size Marshmallows
Instructions
- Break up your cake and place it into a mixer with a paddle attachment.
- Add in your Marshmallow Cream. Mix it until it’s the consistency of play-doh and there are no lumps left in the batter.
- Use a mini cookie scoop to measure out the cake balls. These don’t have to be neat, it’s just for measuring.
- Take each ball and flatten in your palm. Add a few dehydrated marshmallows to the center and then roll them smooth.
- Place the cake balls onto a cookie sheet lined with wax paper and place in the fridge for 10 minutes.
6. Melt your candy coating according to the directions. I like to melt them by putting them into a ceramic mug and heating at 70% power for 30 second intervals with lots and lots of stirring in between. It should be completely smooth and fall off the spoon in an even ribbon.
7. Remove the cake pops from the fridge, dip a lollipop stick into the melted candy and then insert it halfway into the cake ball. Set it aside and continue adding sticks to all of the pops.
8. Completely dip the cake pop and tap off the excess candy. Add any decorations desired. For the large marshmallow on top, add it to the wet chocolate and stand up to dry. For the pops on the graham cracker base, simply place the wet cake pop on the graham cracker square and dry.
9. To toast the marshmallows, I used my gas stove top. I would have prefered to use a kitchen torch to control the flame, but I don’t have one. Be careful not to melt the chocolate candy coating on the pop while toasting the marshmallow. Once it’s soft and melty, simply add a graham cracker to the top.
Enjoy your S’mores Cake Pops!
 For almost 4 solid weeks, I will have a guest blogger here sharing their own S’mores recipe with you. I hope you’ll share their posts the way that you share mine, and show them some love like you do to me!
And, if you are itching for more S’mores recipes…here’s that book of mine. Grab a copy on Amazon!


