Creating a Cake…from Consult to Completion
 If someone had told me 3 years ago that I would be spending my summer in cake batter and fondant – and making money doing it – I’d have laughed at you.
THIS was the first cake I ever “really” attempted – for my grandmother. Three summers ago. All from a box, even the icing. Gag. Don’t ever buy icing in the can unless you are making a cake for my Dad, who has no concept of what good icing should taste like. Anyway, I had just gotten the Hello, Cupcake book, and saw those little chocolate butterflies, and decided whatthehell, I’m gonna make her a birthday cake.
And this is what it looked like. I mean, seriously. Look at that piping work. Are you kidding? Saddest thing ever. But God love her, she said she loved it. She’s required to say things like that, though.
She’s related.

And this year, here I am, exactly 3 years to the week, making the most challenging WEDDING cake I’ve ever attempted. (If you’re my bride, no worries. I’ve done all the techniques at some point, just not all at once.) I had a LOT of folks following along a couple of weeks ago as I live blogged a weekend of wedding cakes, so this time, I wanted to give you a little more background as well as the process.
My bride has been a GEM. I haven’t met her. At all. She saw and sampled one of my cakes over the winter, at a friends wedding, so she booked based on that. Her requests? Colors, pretty much. White, grey, and pale yellow. She sent a few pictures over of cakes that she “kind of liked” – all were round, white, and had dots of some sort on them.
So I designed a cake. Or 4. She chose the bottom left one, because it had ruffles, like her dress. But then something just didn’t feel right to me. Ruffles, that look like that design? This I needed to see.
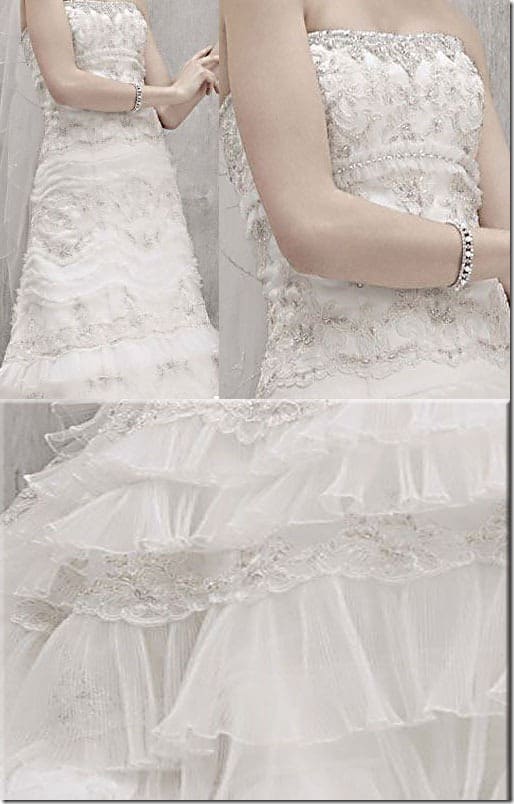
I asked her for a photo of her dress, and if there was anything special she may be wearing, such as pearls, or a bracelet. She sent me back THIS dress…
A simple cake was NOT for this lady.
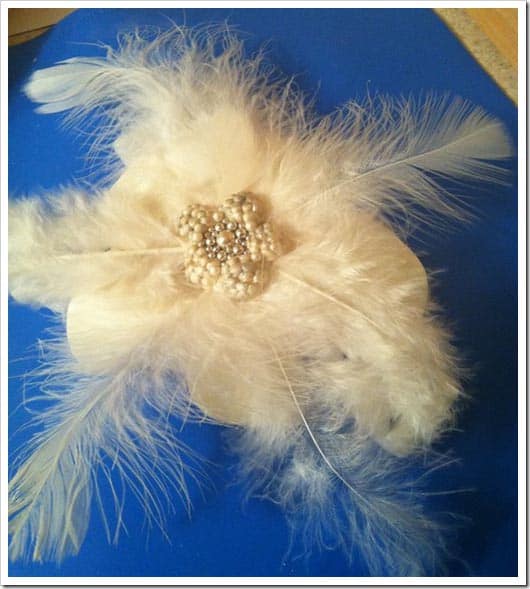
She then sent me THIS as her hair accessory…
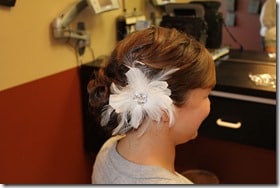
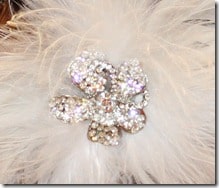
Are you kidding me?? This girl has taste. We needed to go big, or not go at all. So, I offered to do a redesign, and keep the price the same as it would have been, if she was willing to trust me a little.
She said yes…and here was my concept…(she said she LOVED it!!)
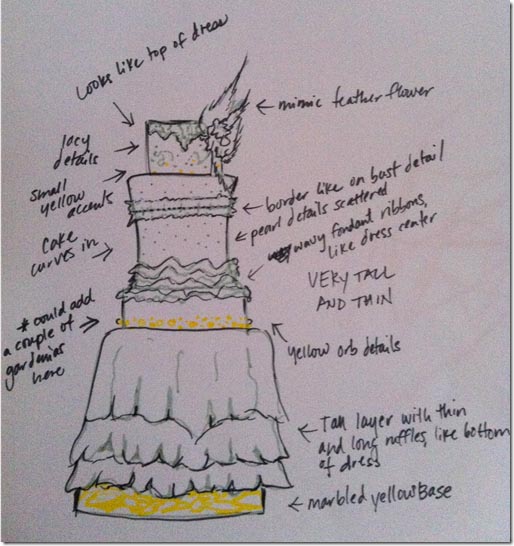
As you can see, it’s a ROUGH sketch, but it has all of the elements I wanted to include. The top of her dress is heavily beaded, and exquisite. Here’s a close up…
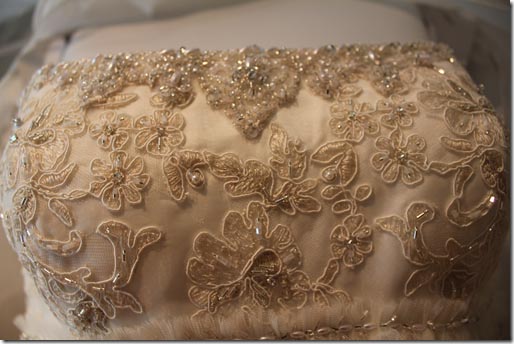
I also wanted to get those long, flowy ruffles like at the bottom of the dress. See the trim detail at the bottom of that picture, just under the bust? I love that, too, so I decided it MUST go in. And the pattern of the smaller ruffles? It may be difficult to see in the montage photo up there, but they are in a triangular pattern, undulating up and down. I wanted to get that in there, too. I knew she wanted some yellow as well, so I managed to incorporate a bit, and am so far pleased with how that’s going. Lastly, I had to use the feather flower. HAD TO. So there it is, decorating the top of the cake.
It’s a VERY complicated cake.
Very.
I started with the feather flower. I was frightened a bit, so I made two, just in case. One from fondant, the other from gumpaste.
Don’t make yours out of fondant. Consider yourself warned. And don’t get the silver dragees wet, don’t paint them, don’t TOUCH them once they are places, or you’ll be sorry. Since they a re candy, made of sugar, when wet, they begin to disintegrate. Now you know.
Here’s what I ended up with.
Basically, I used 5 small balls of gumpaste, and pushed them into a flower center mold. I don’t know what else to call it. it the center of a flower, like a daisy, or mum, or something. Just, the center. it gave me a plethora of little raised dots, which was perfect. I attached them to another larger piece of gumpaste in a flower shape. in the center, I began with a large 12mm dragee, and surrounded it with smaller 8mm dragees in both silver and oyster, as well as 2mm silver dragees. it was time consuming and relaxing, all at the same time.
I also used a flower vein mold to make the leaves for the actual FLOWER in the feather flower. I just rolled out the gumpaste thinly over the impression mold, then trimmed it into one large flower, using my fingers to press the edges very thing. In the center, I added a mound of gumpaste, and stuck the feathers into it, after which I added a touch of water and then pressed my bejeweled flower onto it. I also brushed quite a bit of luster dust onto it, avoiding the jewels. Looks pretty good I think!
Stay tuned for more!!

